Step-by-step instructions for converting product photos into marketplace-ready listings using ListAgent AI.
ListAgent uses artificial intelligence to analyze your product photos, extract item specifics, and generate complete marketplace-ready listings. Follow this step-by-step guide to take your products from raw photos to live listings[cite: 4].
Ensure you have the following prerequisites configured[cite: 4]:
Clear Product Photos: Images showing product tags, fabric/material details, brand labels, and any flaws.
SKU Strategy: A structured SKU naming convention if you plan to batch-process multiple items.
Marketplace Connections: Active connections to eBay or non-eBay channels via the Chrome Extension.
eBay Prerequisites (If publishing to eBay): Configured Business Policies (Payment, Shipping, and Return) and a default Inventory Location in your account[cite: 4].
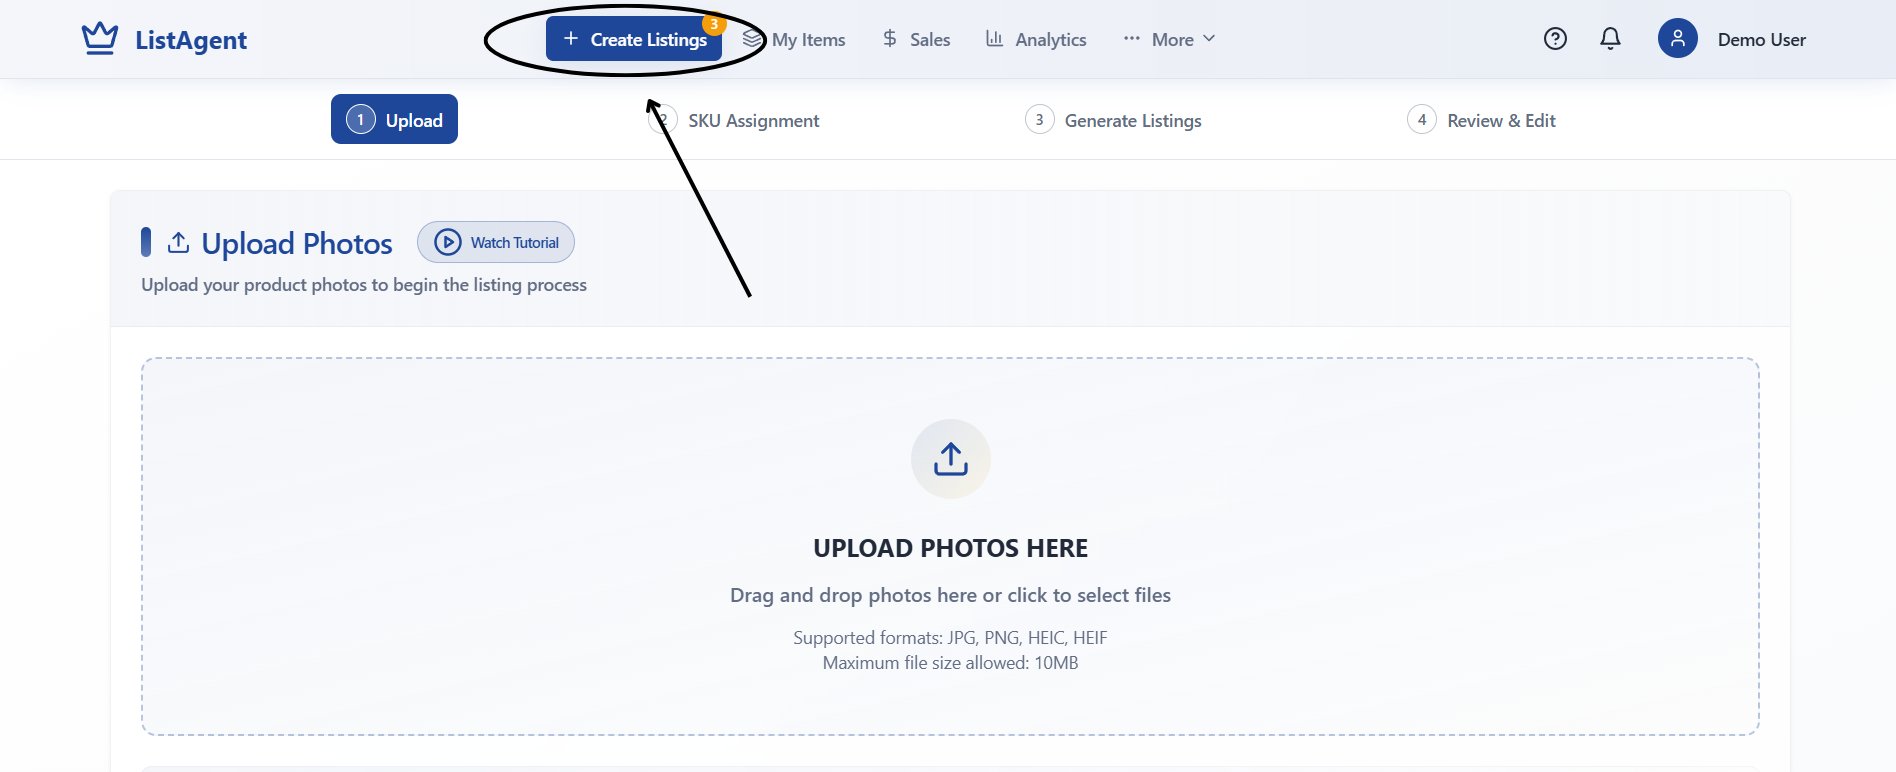
Log in to your dashboard and click the + Create Listings button in the top navigation bar to start the workflow.
Click '+ Create Listings' in the dashboard header
2
Upload Product Photos
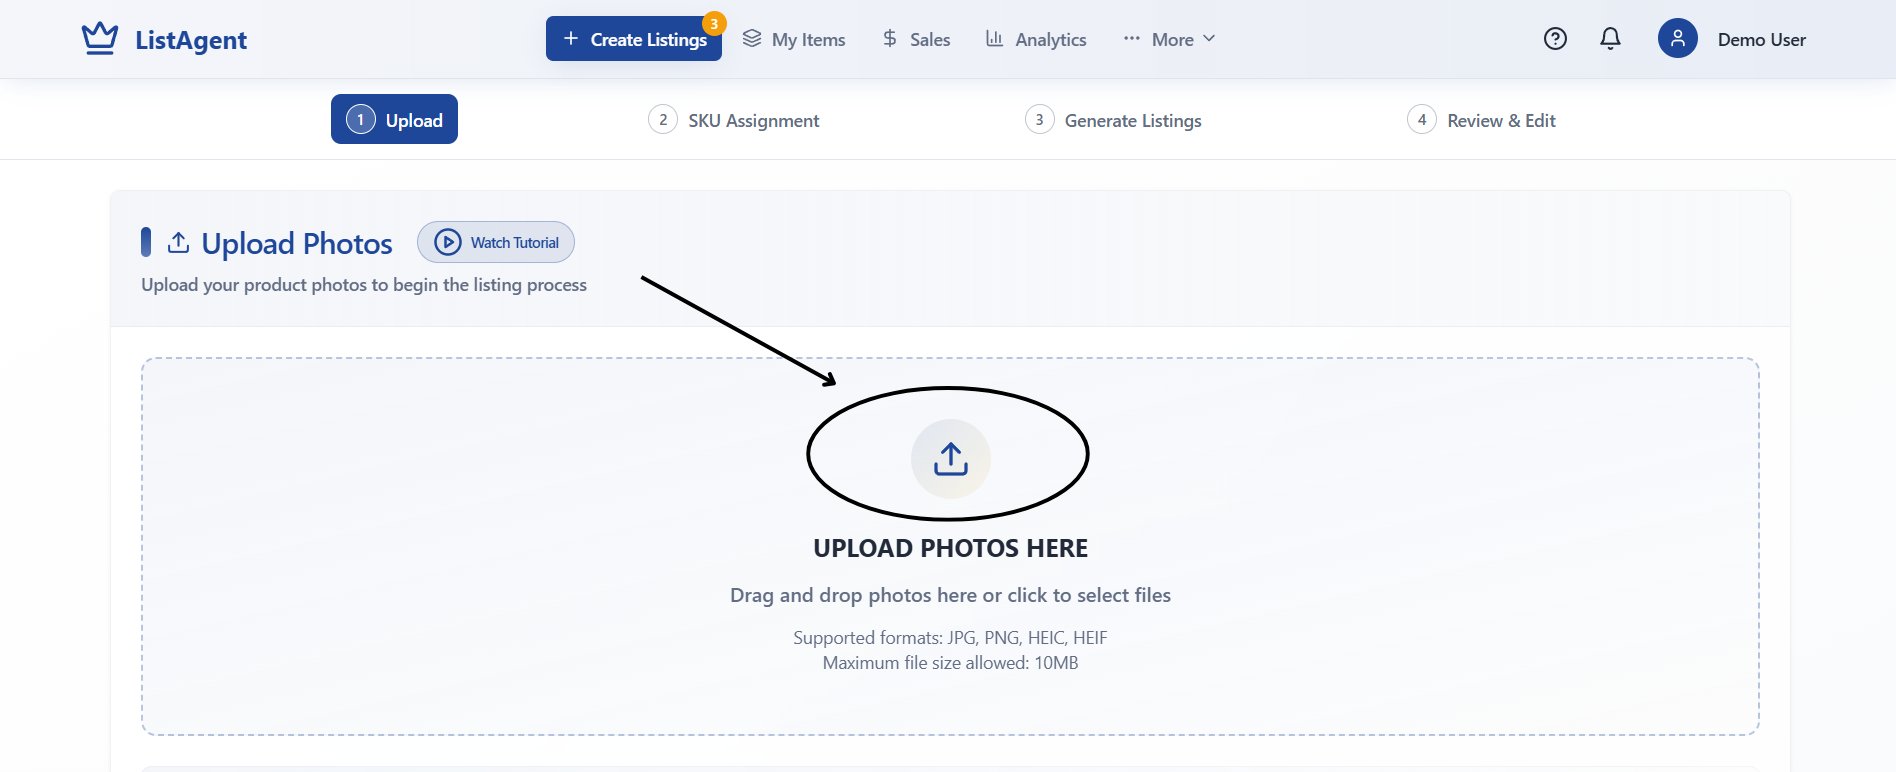
Drag and drop your photos into the upload box, or click the upload icon to select files from your computer.
Upload zone supporting drag-and-drop file imports
Supported File Types: JPG, PNG, HEIC, and HEIF.
File Size Limit: Up to 10MB per image.
Batch Uploading: You can upload multiple product sets simultaneously.
Photography Best Practices for AI Accuracy:
Take well-lit, centered photos against a clean background.
Include close-up shots of brand tags, size labels, material tags, and care instructions.
Clearly photograph any flaws, stains, or wear so the AI can include them in the condition description.
3
Assign SKUs to Group Photos
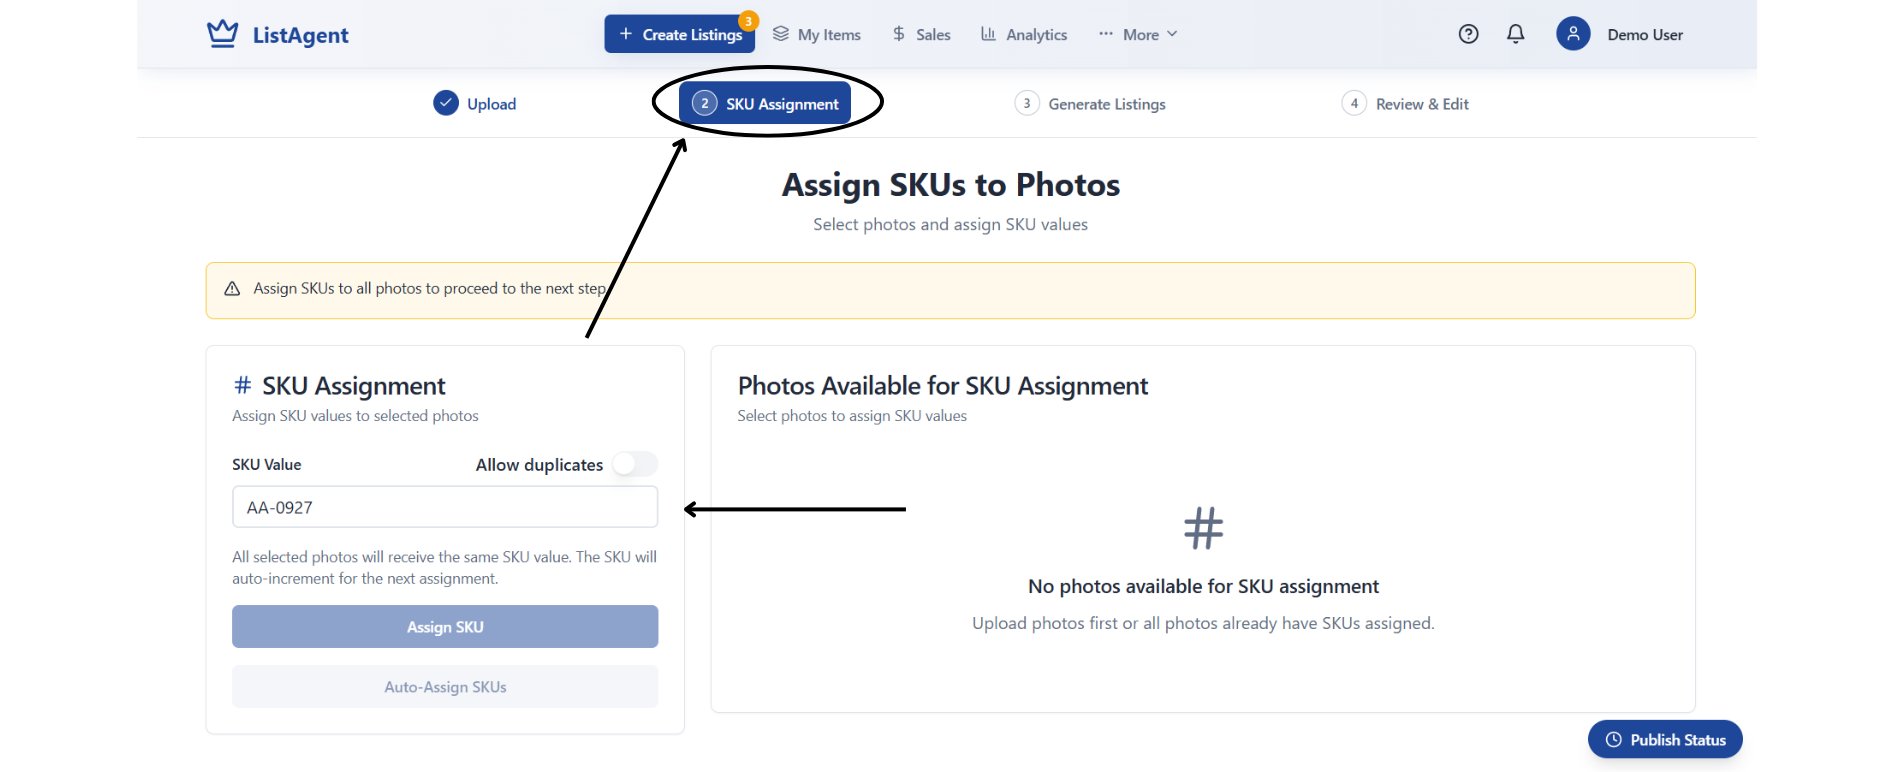
Once uploaded, assign SKU values to group photos that belong to the same item.
Assign SKU values to link individual photos into a single item listing
Select all photos corresponding to a single product.
Enter your identifier in the SKU Value field (e.g., AA-0927) and click Assign SKU.
Use Auto-Assign SKUs if you want ListAgent to auto-increment SKU codes sequentially across your images.
4
Generate Listing Content with AI
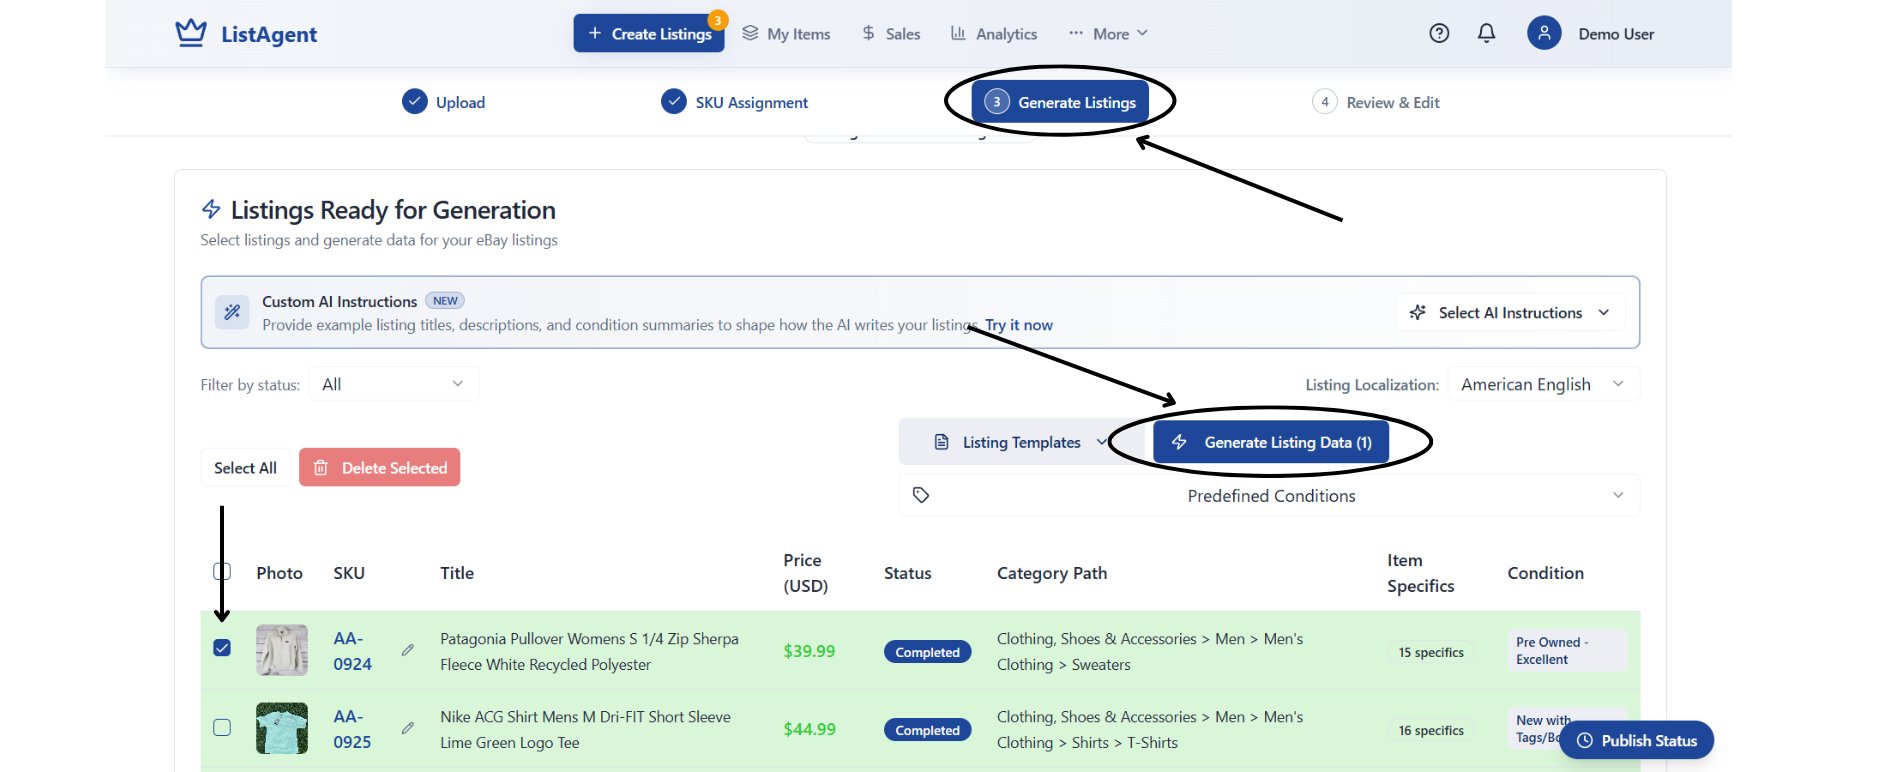
Navigate to Step 3 (Generate Listings). Select the SKU items you want to process, choose any optional Listing Templates or Custom AI Instructions, and click Generate Listing Data.
Select assigned SKU items and click 'Generate Listing Data'
The AI engine processes your images and generates:
Generation typically takes a few seconds to a couple of minutes depending on the batch size. If a large batch takes longer than expected, refresh your browser; the status will update automatically.
5
Review & Edit Generated Details
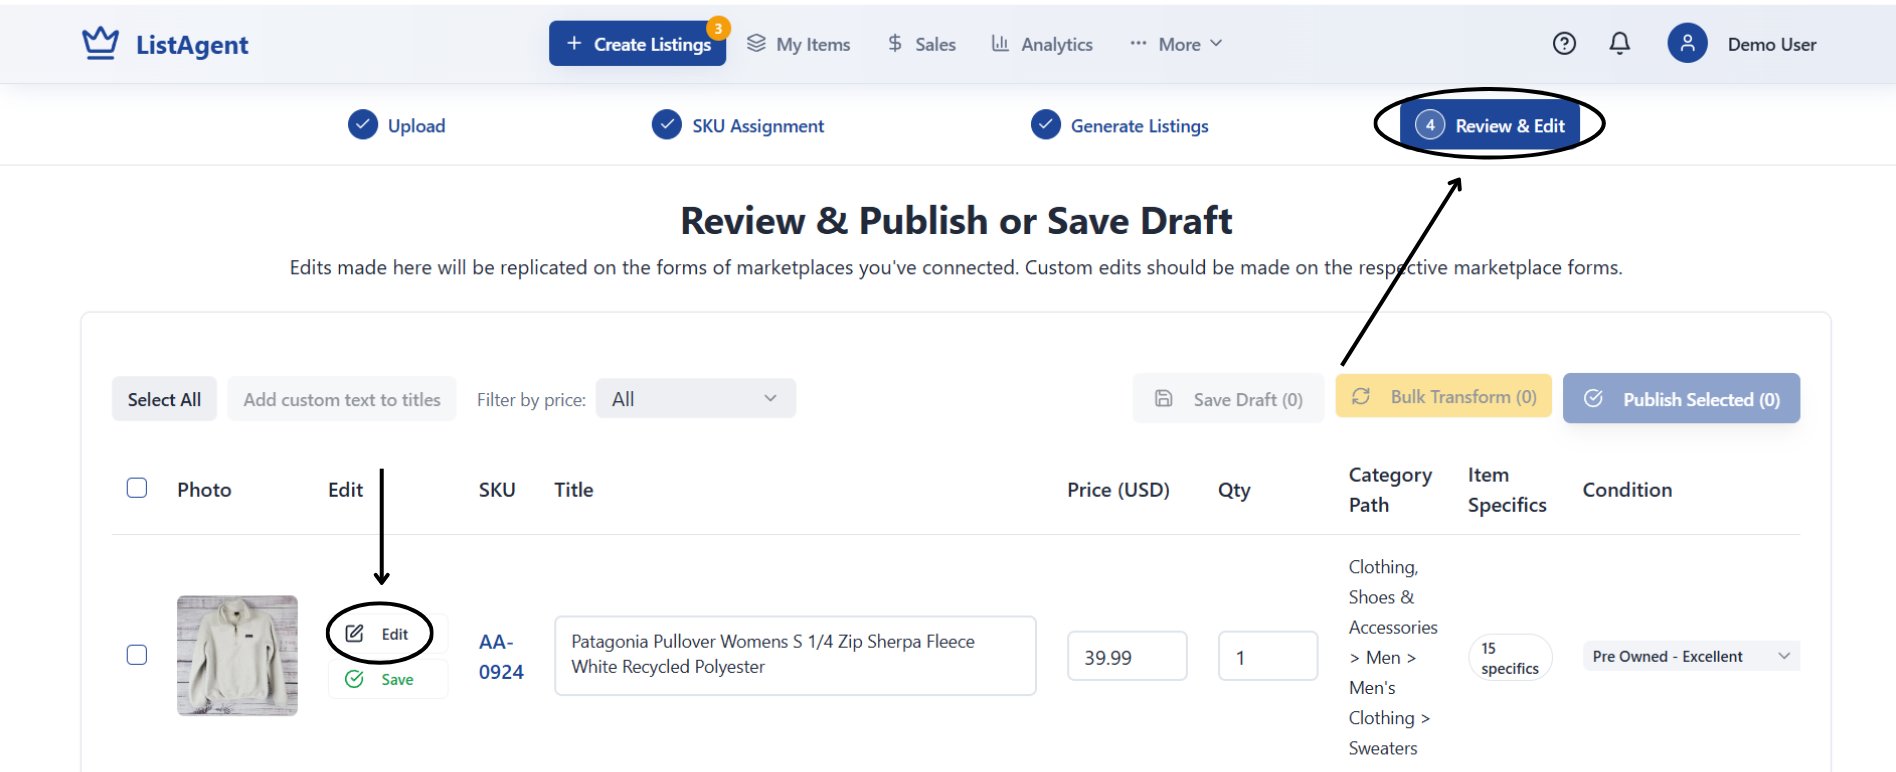
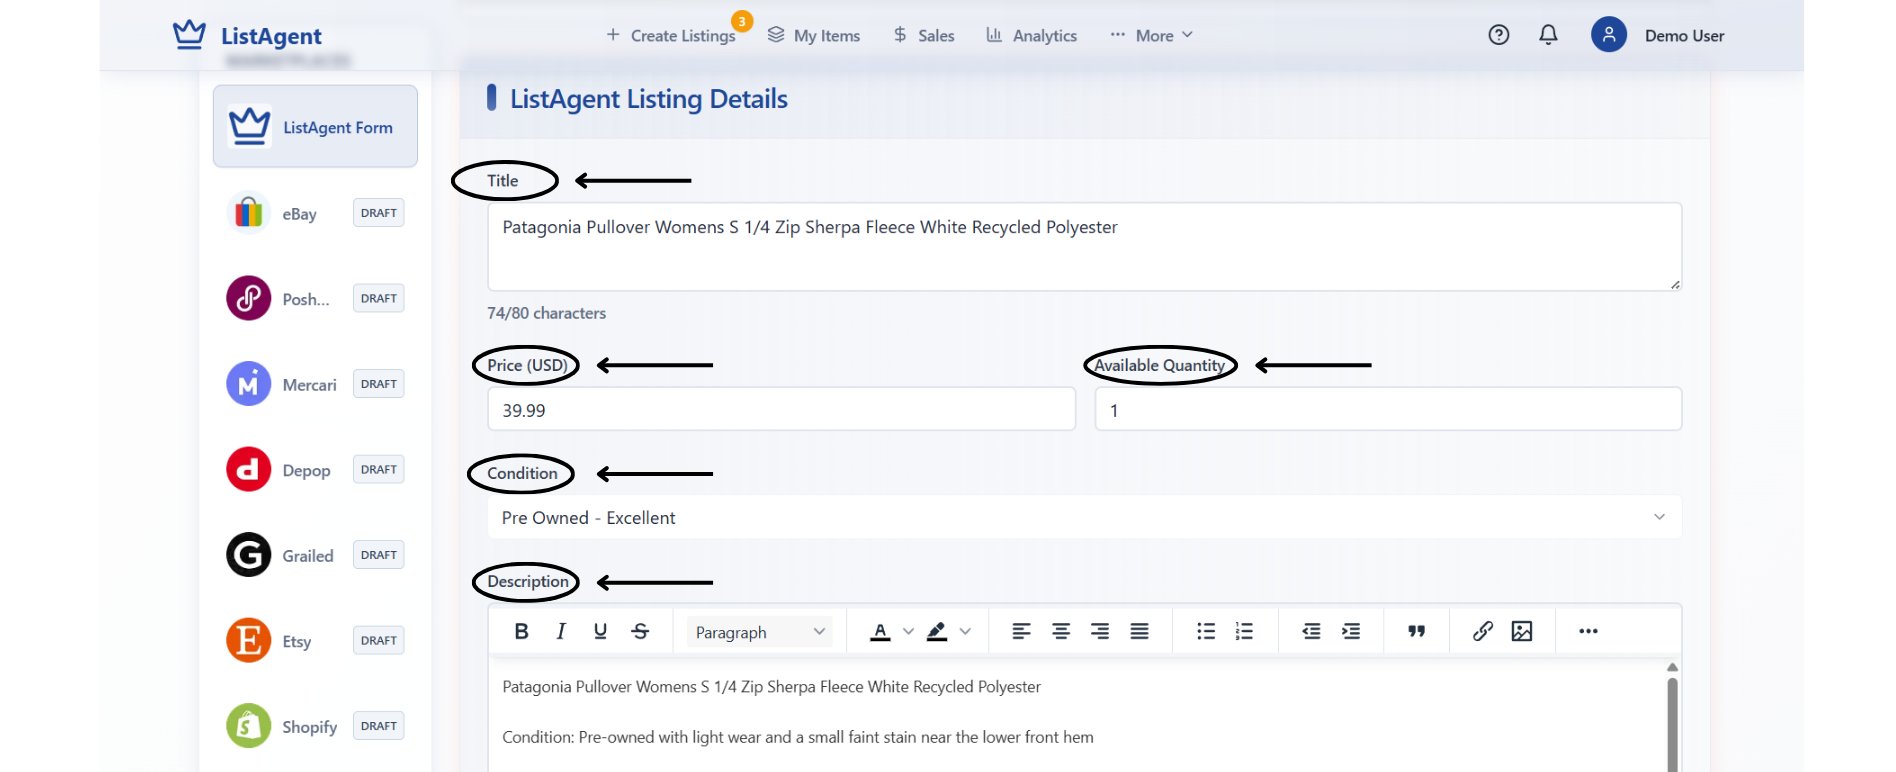
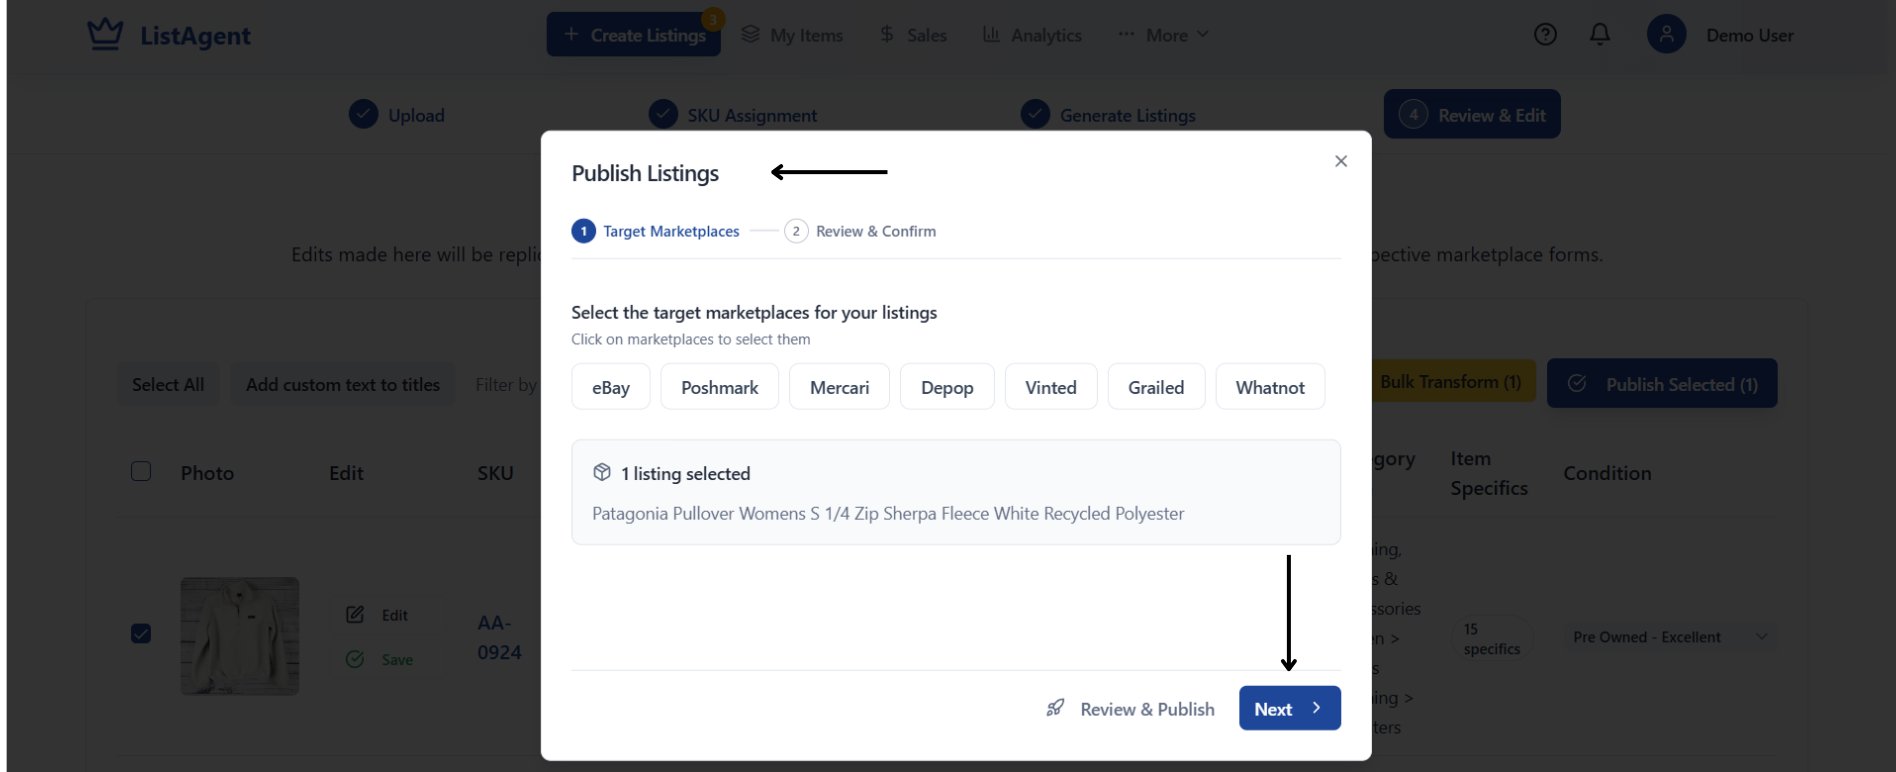
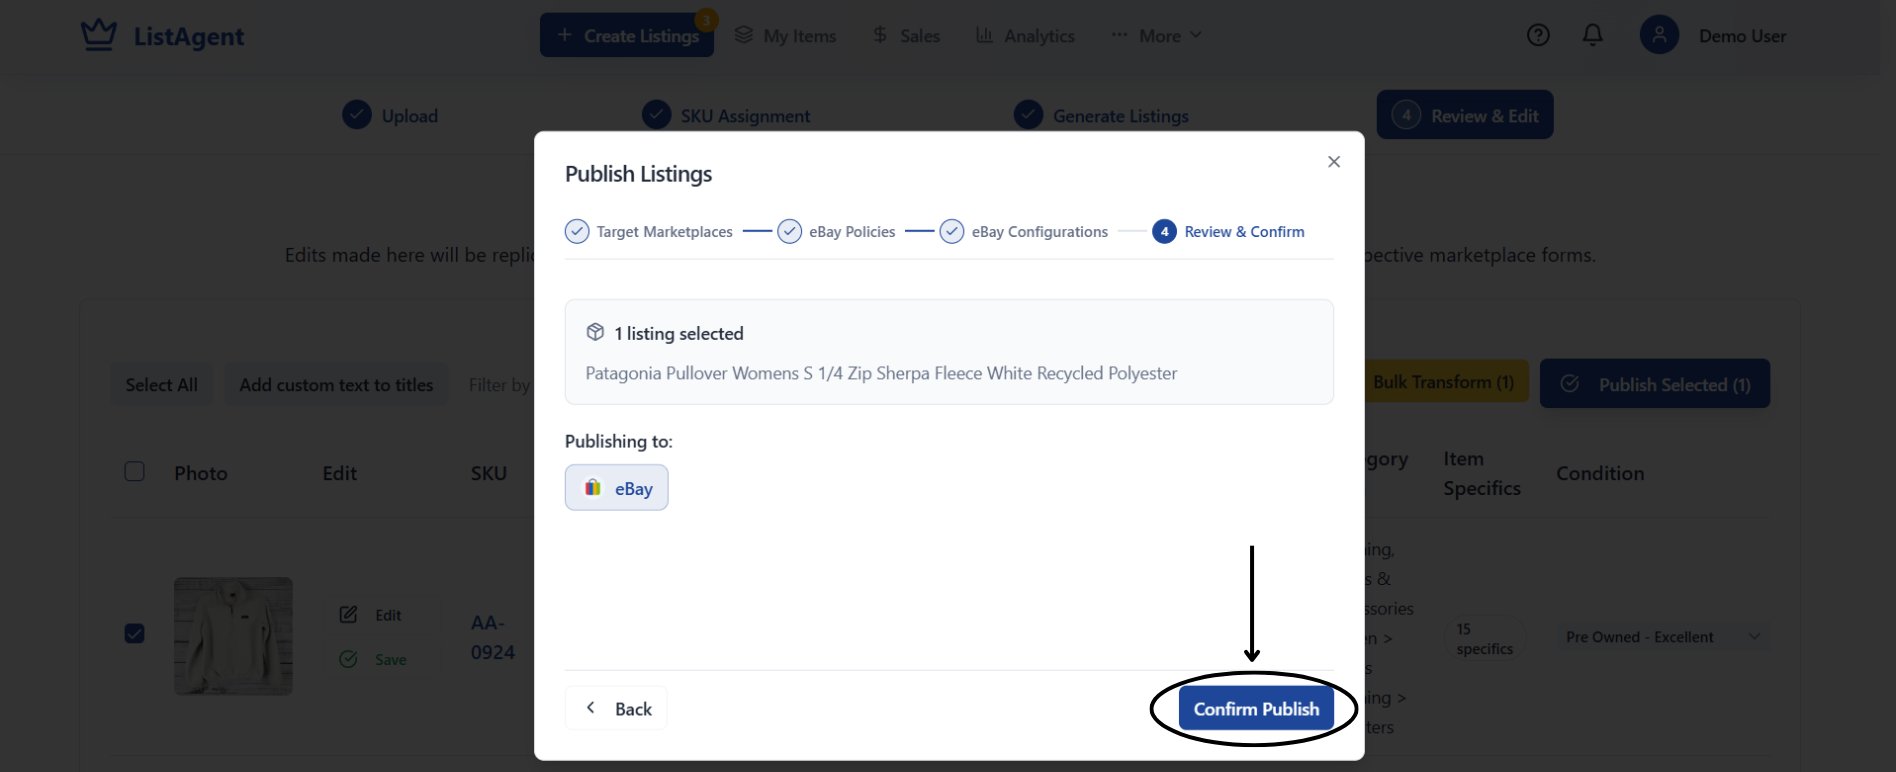
Always inspect AI-generated outputs before publishing to ensure accuracy. Click the Edit button next to any listing card to open the listing editor.
Review previews and open the inline listing editor
Listing editor form for fine-tuning titles, pricing, quantity, conditions, and descriptions
AI Generated an Inaccurate Brand or Model: Click Edit on the listing card and manually correct the title, category, and item specifics before publishing.
Target Marketplace is Greyed Out: Ensure your marketplace account is connected under More → Connect Marketplaces.
eBay Publishing Failed: Check that your eBay Business Policies (Payment, Return, Shipping) and Inventory Locations are active and configured in your settings.
Generation Stuck for More Than 30 Minutes: Refresh the page. If the job does not update, retry generation or contact ListAgent support.